
Connecting Xendit
Xendit is a payment gateway for merchants in Hong Kong, Indonesia, Malaysia, Philippines, Singapore, Thailand, and Vietnam. Shuttle’s integration currently cards and alternative payment methods (APMS) like bank transfer and wallets.
Setup
- To connect to Xendit you need these credentials:
- Secret API Key
- Public API Key
- Webhook Verification Token
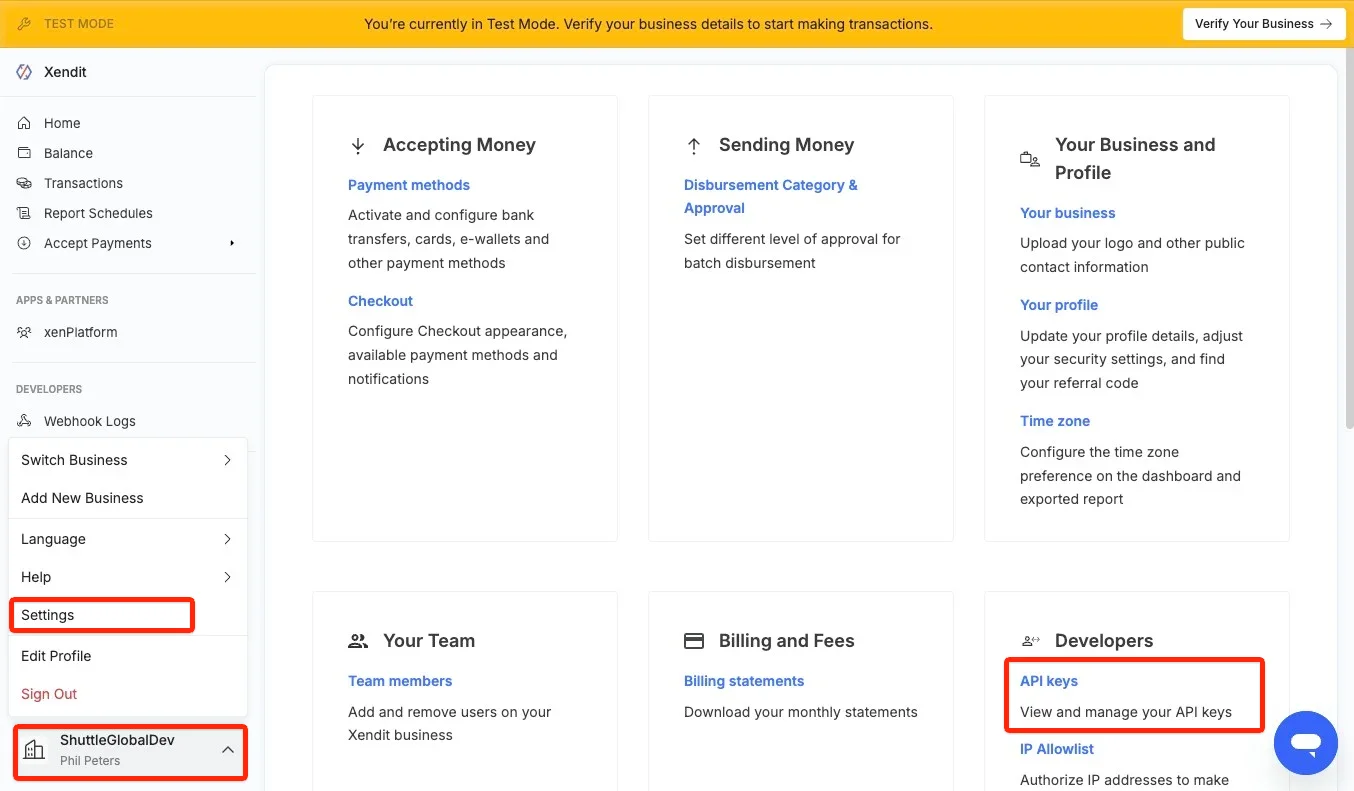
- You can access these in your Xendit console, under Account → Settings → API Keys:
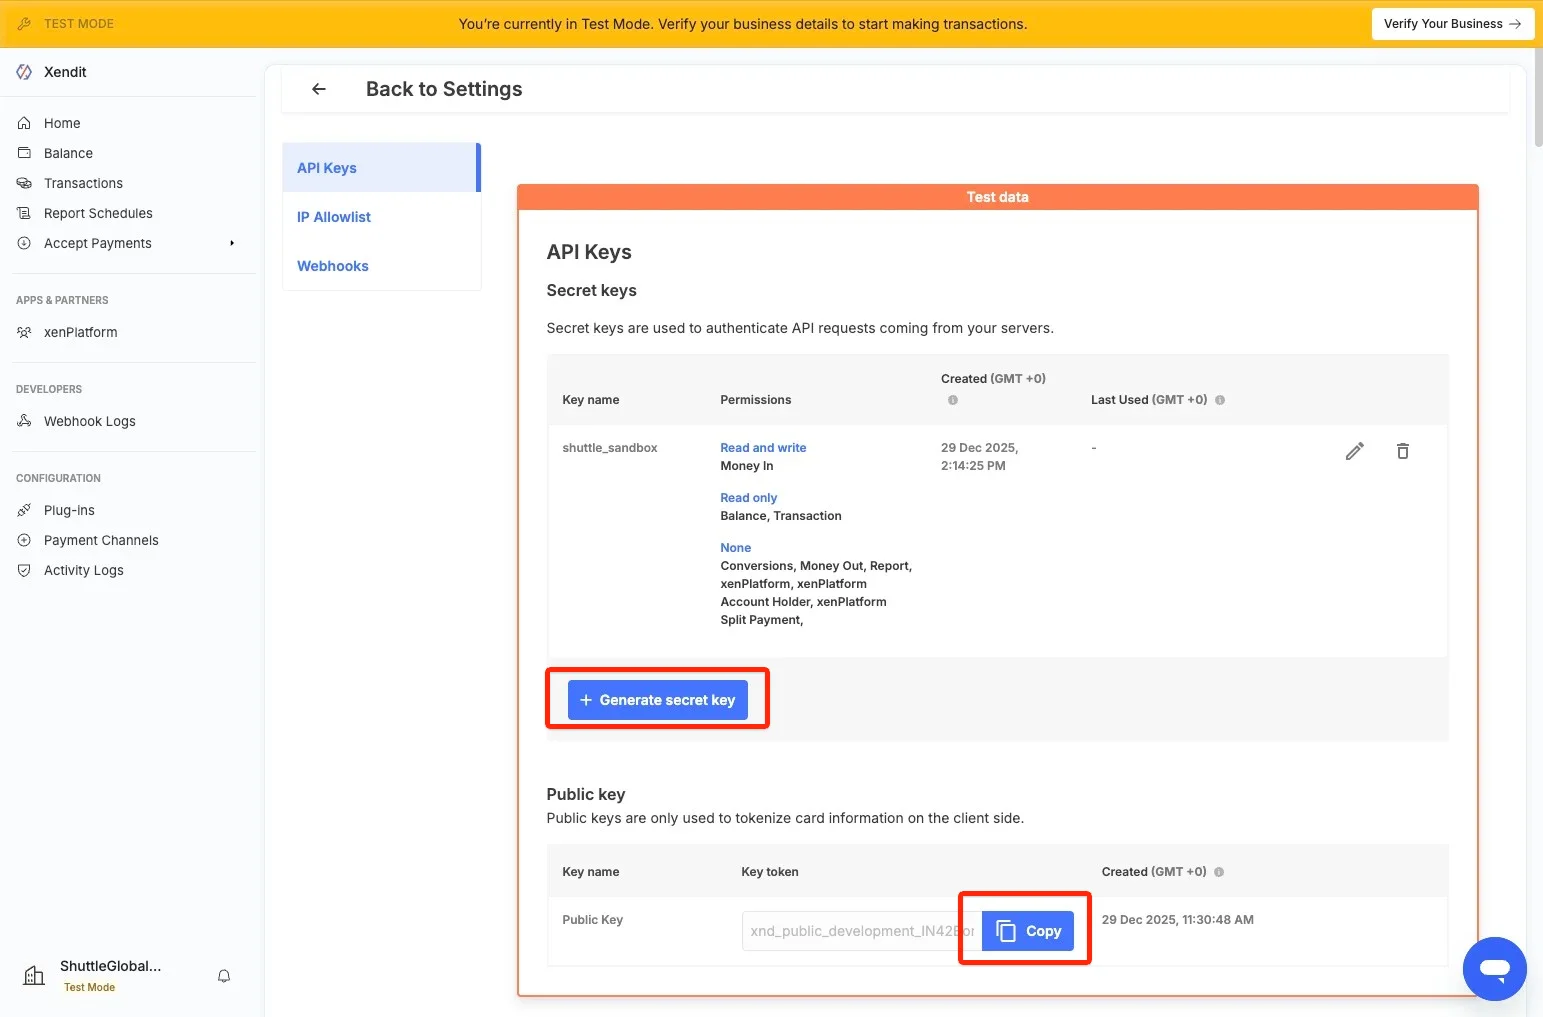
3. Note your “Public Key”, then select “Generate Secret Key”, and create a key with:
Name: shuttle (or whatever you wish)
Select: “Write” for “Money-In products”, Read for “Balance” and “Transaction”
Select “Generate Key”, you will be prompted to enter your MFA code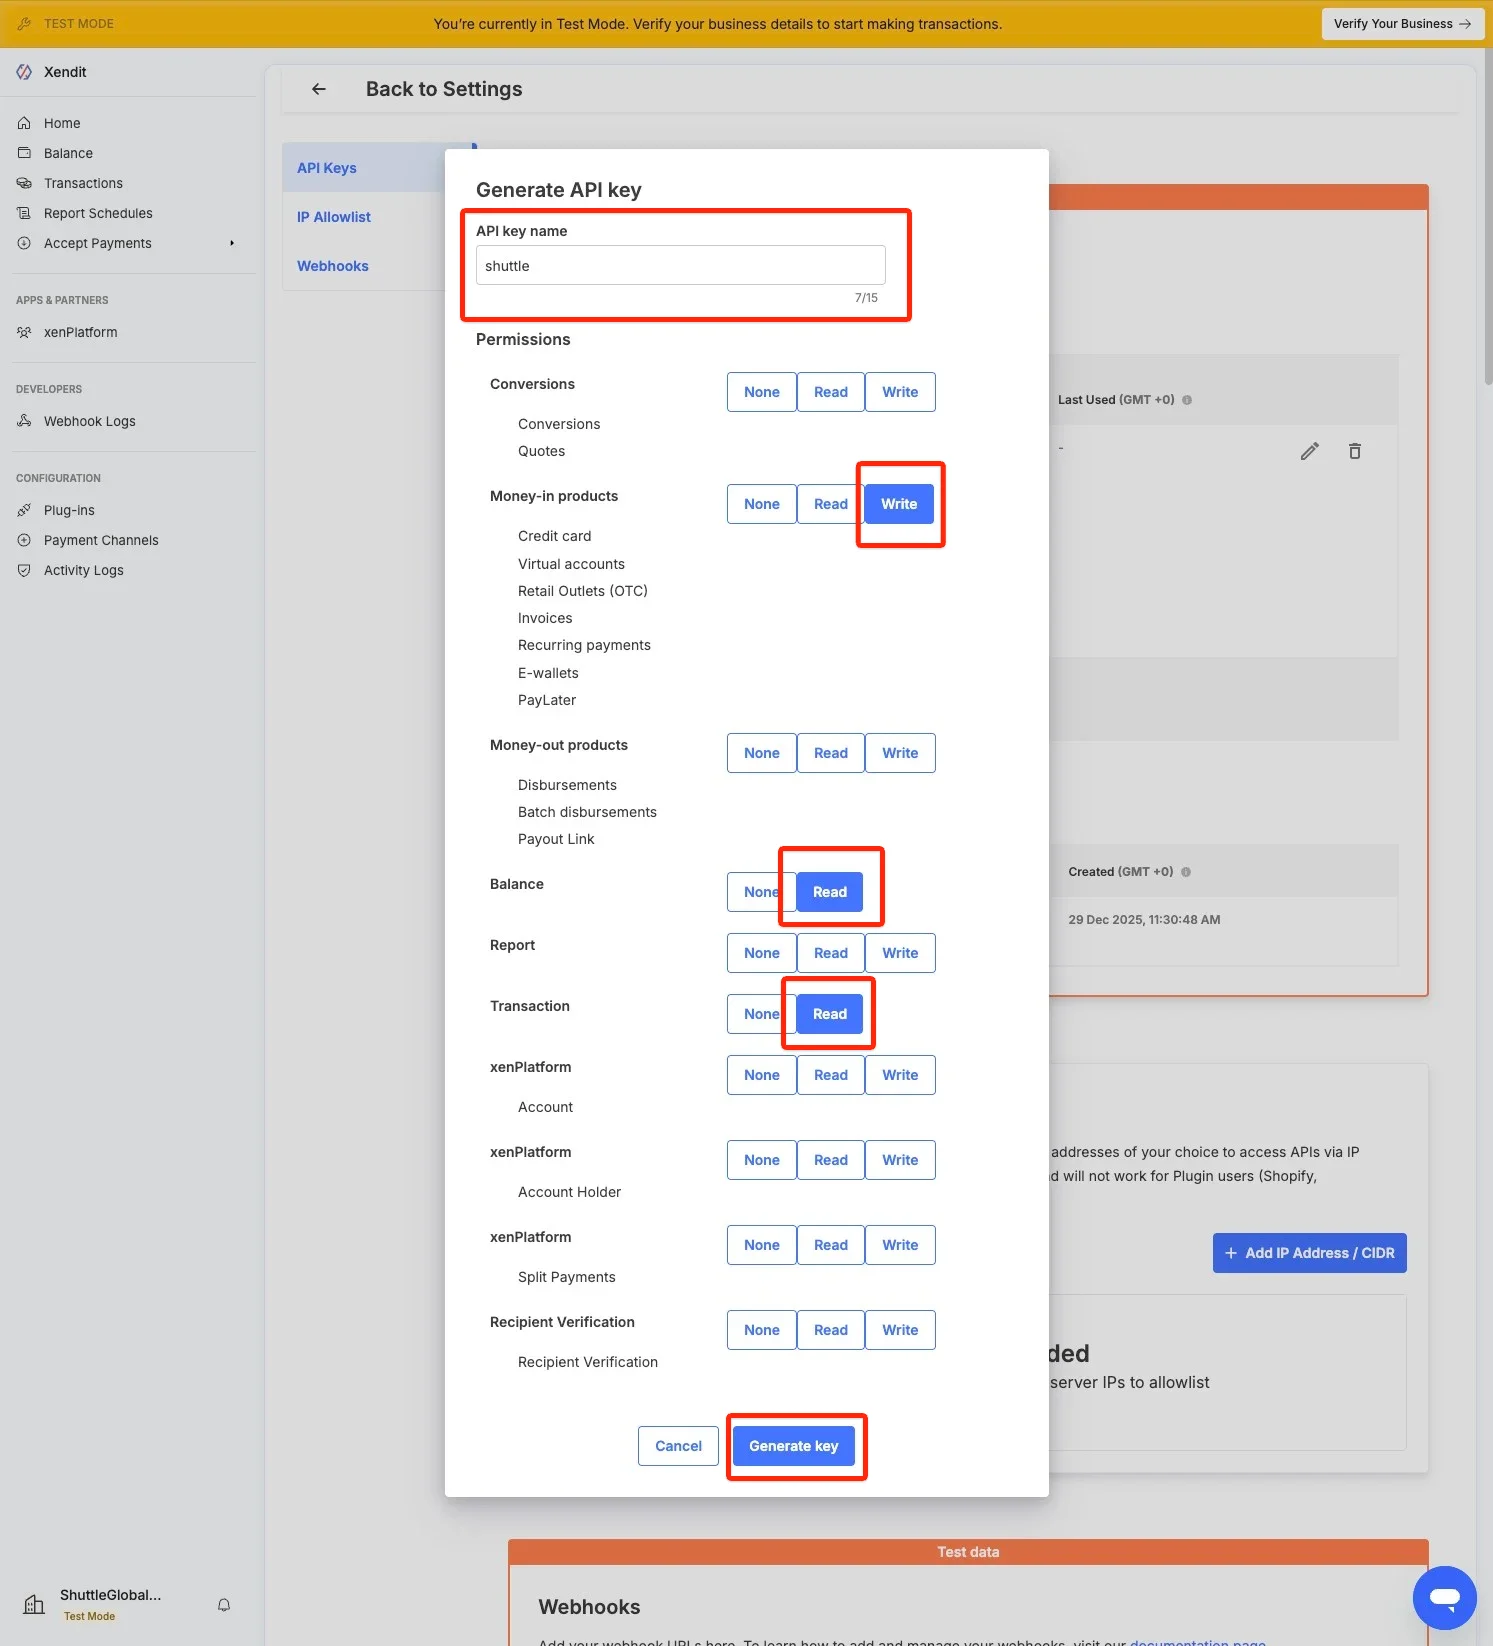
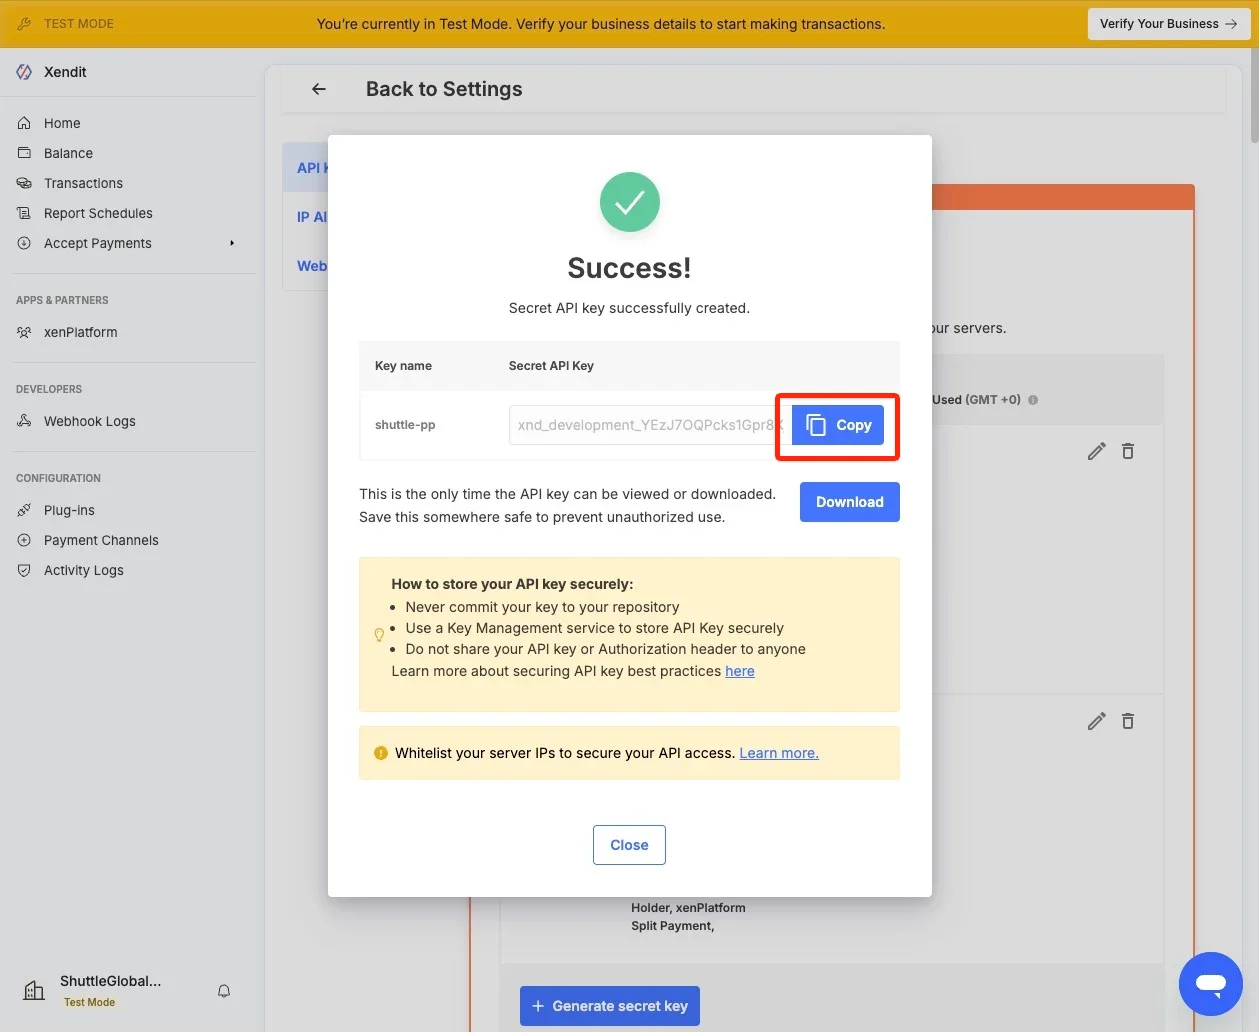
This is your “Secret Key”.
4. Select “Webhooks” and “View Webhook Verification Token”, and remember this value

5. In Shuttle enter the “Secret API Key”, “Public API Key”, and “Webhook Verification Token”, select your country and click “Save”
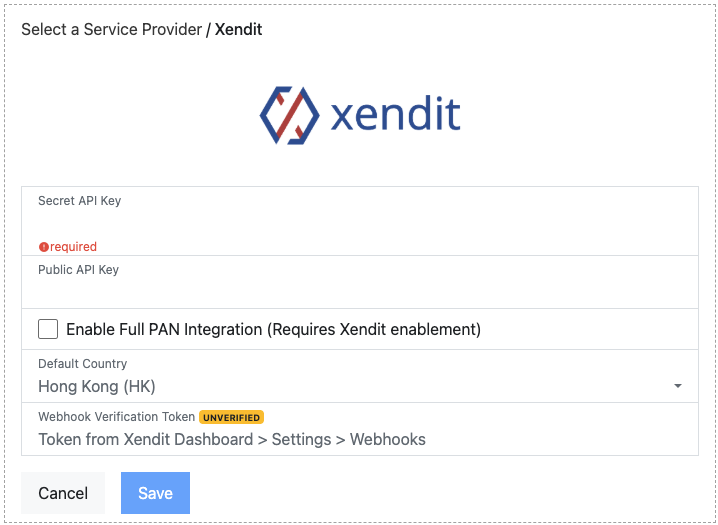
Our integration with Xendit offers the additional option:
- Enable Full PAN integration: You must have this feature enabled by Xendit on your account and this will allow you to perform MOTO (staff entered / DTMF) payments.
6. Once connected, you will be presented a green “Connected to Xendit” message, the API Key will not be displayed.
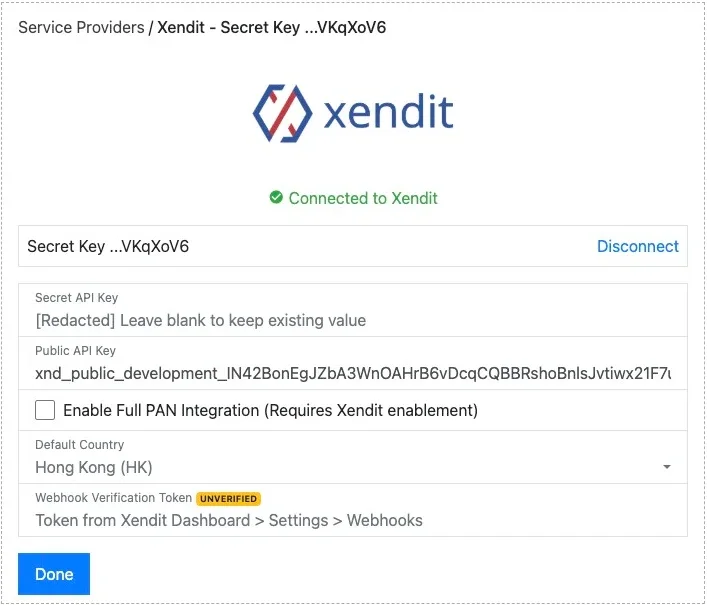
7. To complete configuration ensure your webhooks are configured correctly, by performing a test payment, if you have configured webhooks correctly, you will receive a green “VERIFIED” badge.
NOTE:
- UNVERIFIED: We have not yet received a webhook → do a test payment
- UNSIGNED: We have received a webhook but the Verification Token was not correct
- VERIFIED: We have received a webhook and the Verification Token matches → DONE!