Connecting NMI
Connecting to NMI require a NMI username and password. We highly recommend you create a dedicated user on NMI for this purpose.
Setup
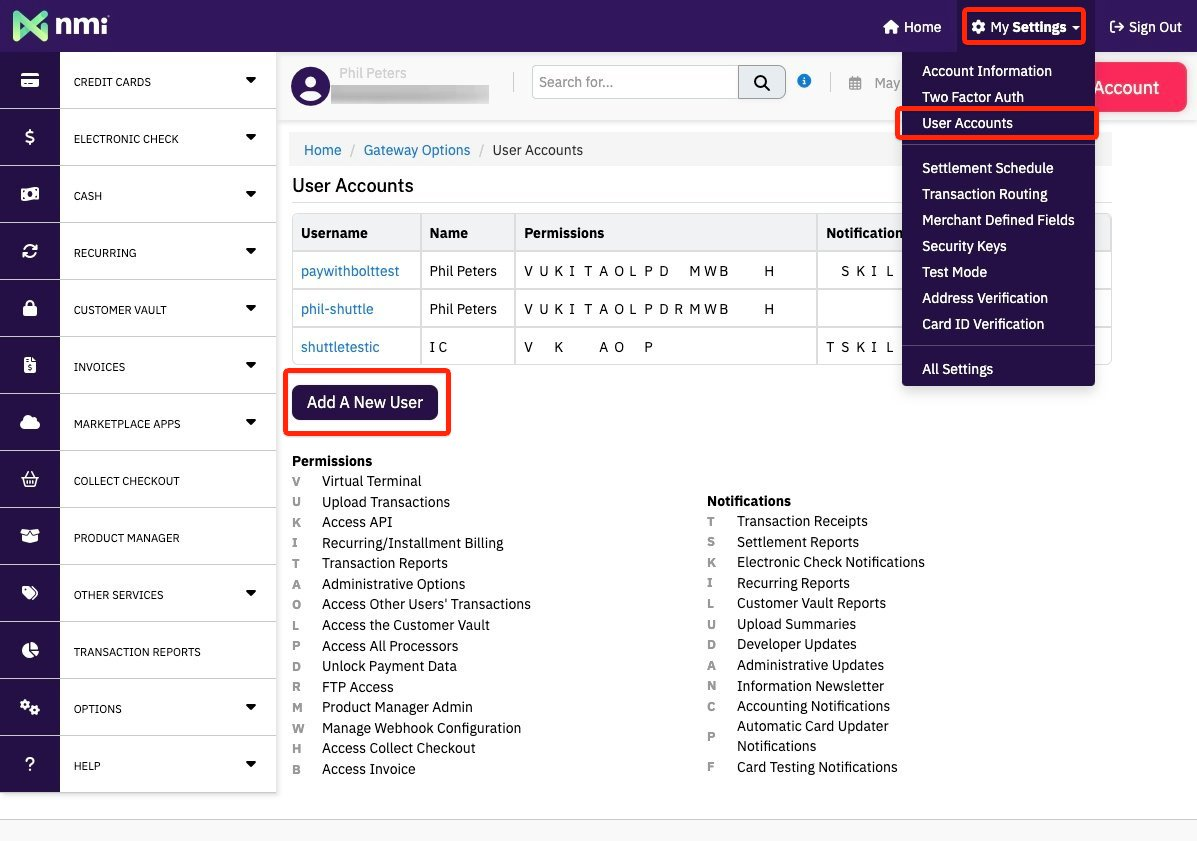
- Login to NMI and select “My Settings → User Accounts → Add a New User”
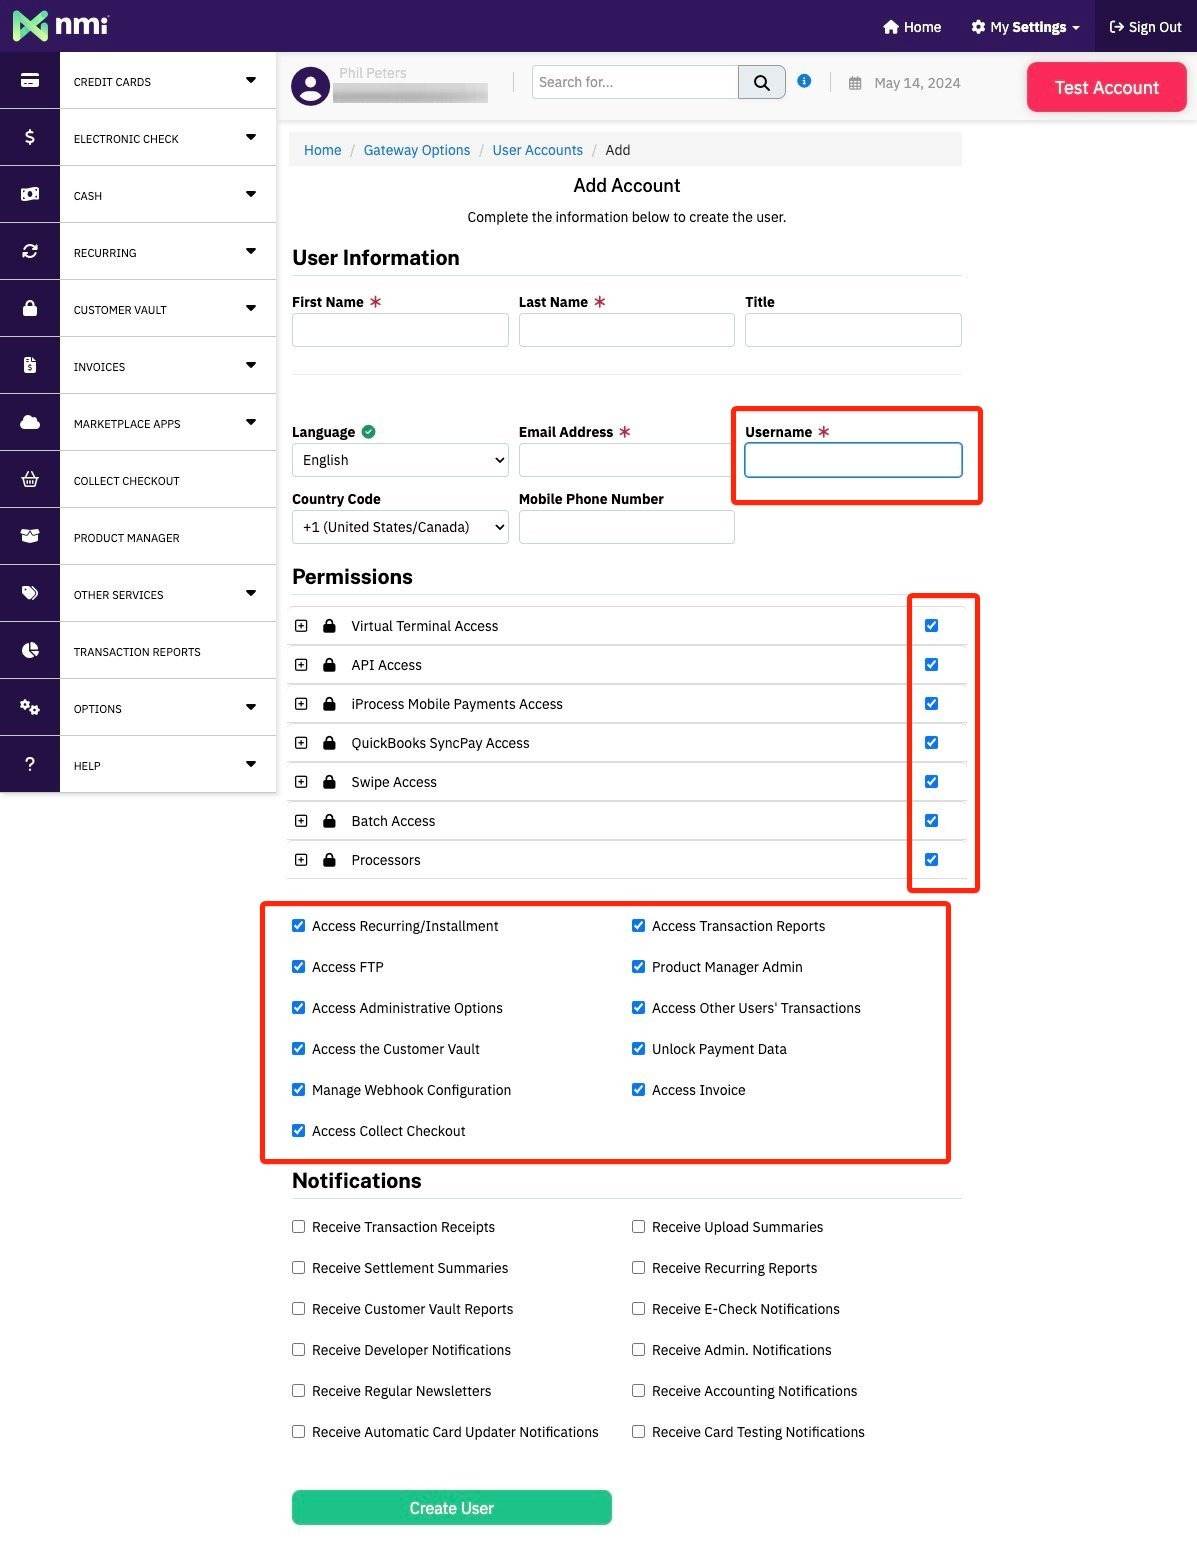
You will need to use an email you have access to, you can typically use your existing email with +api, eg myname+api@company.com to have a unique email address that is directed to you. Create a user account.
Note:
- “username” - you’ll need this
- You enable all permissions
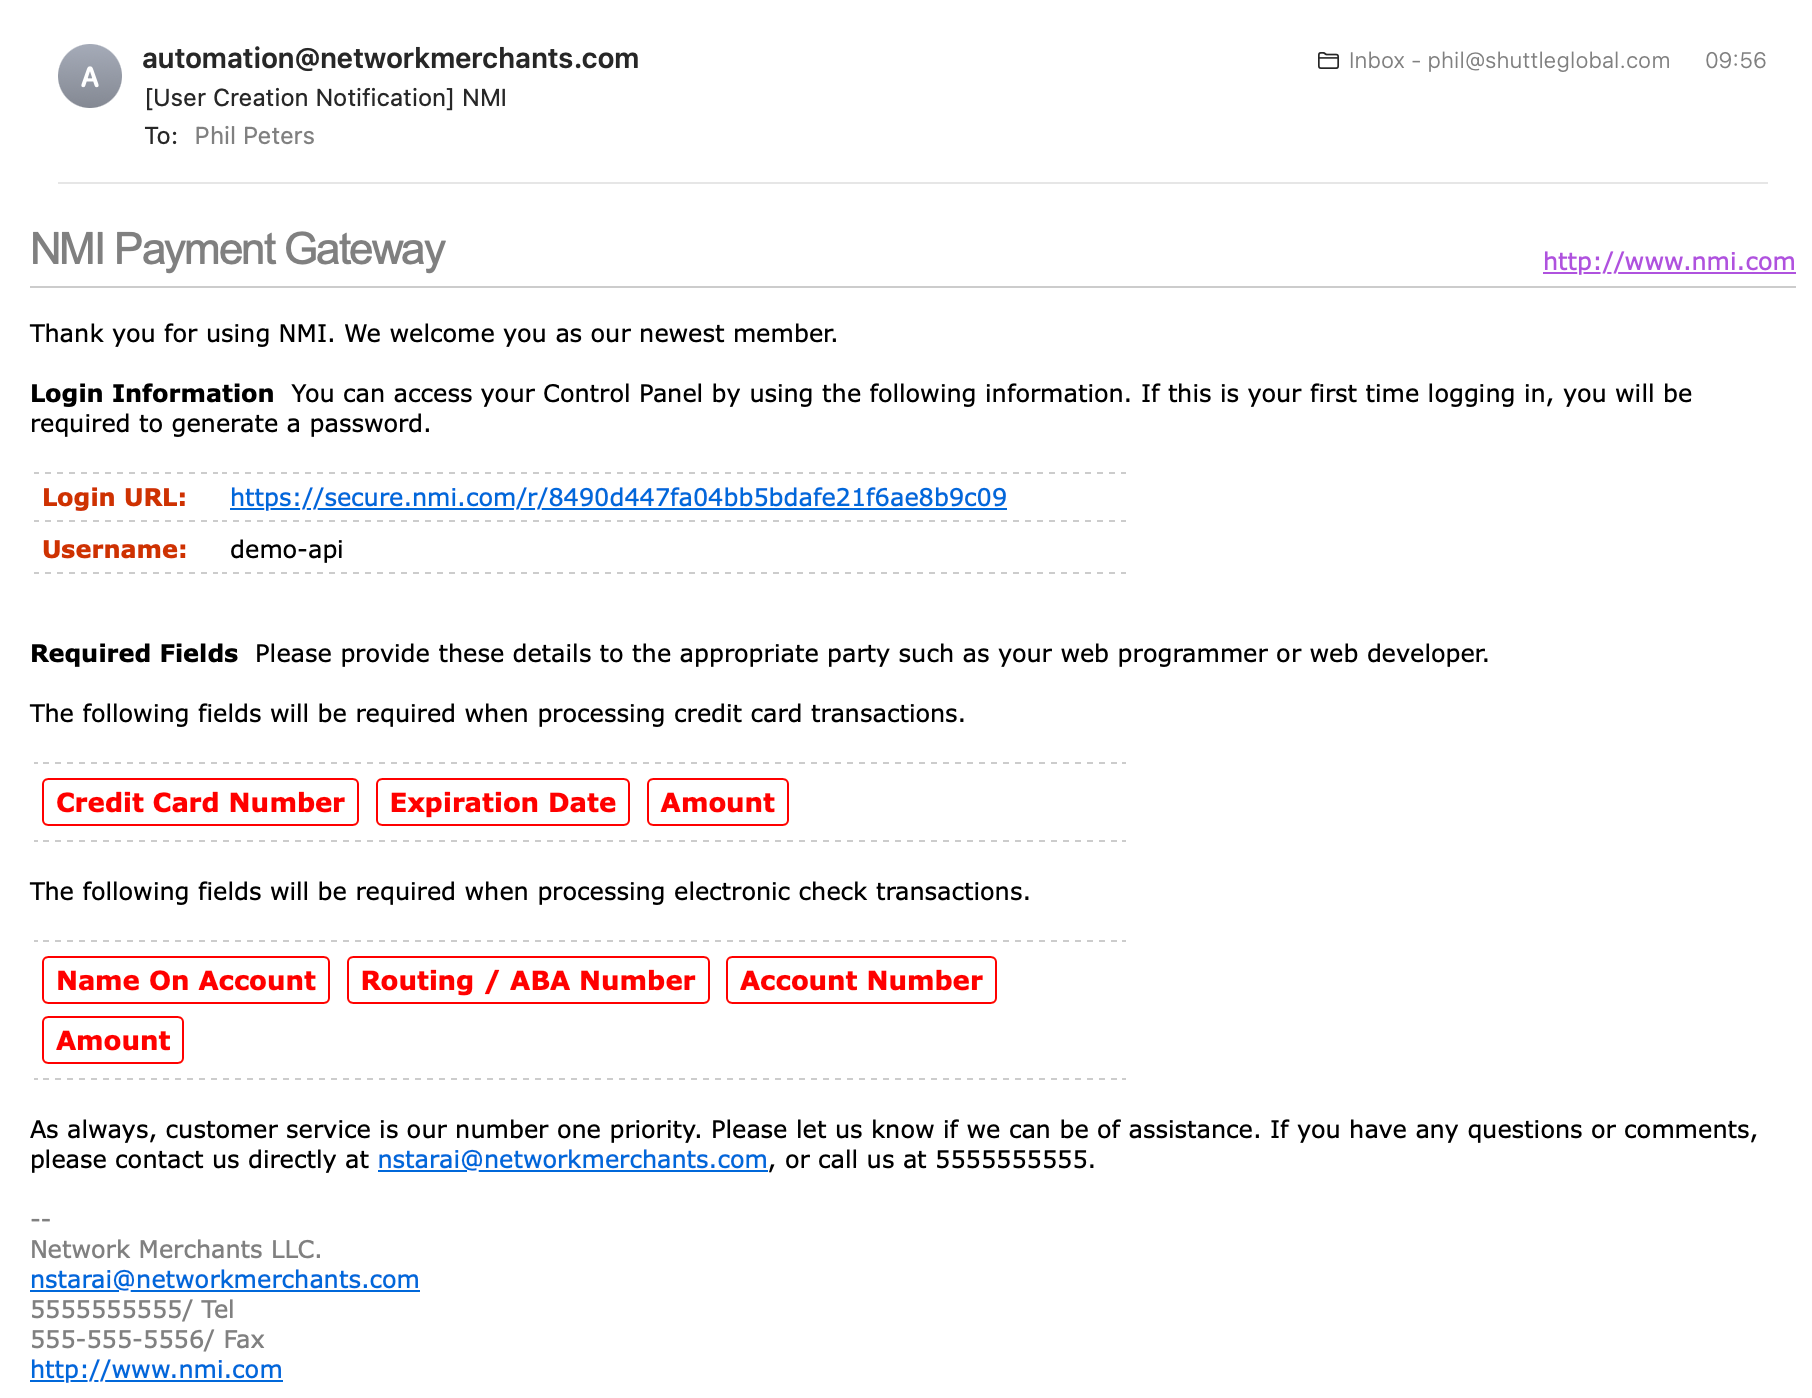
You will receive an email with a link for you to create a password.
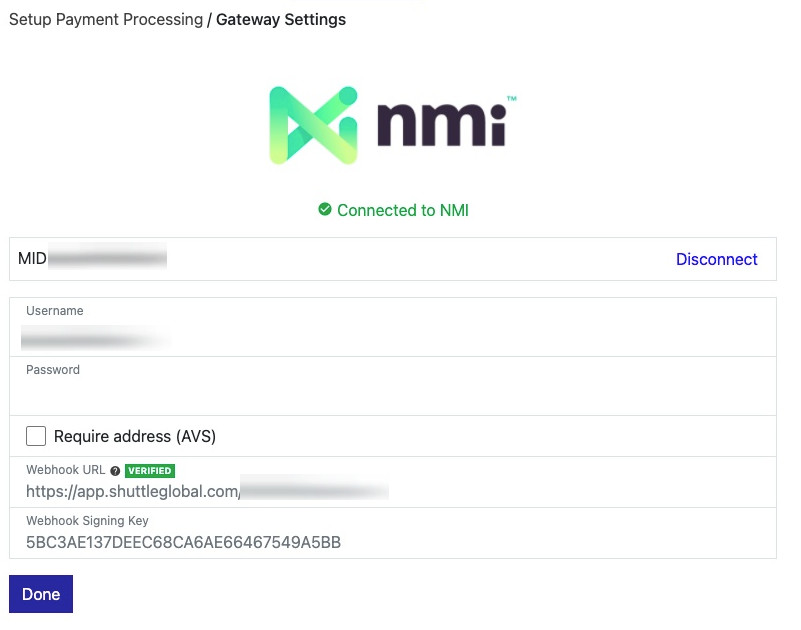
2. In the NMI connection screen, enter your your username + password and select save, the connection will be tested and you will be presented a green “Connected to NMI” message, if there is an error with the connection, check the account details are correct and you have granted the user all permissions.
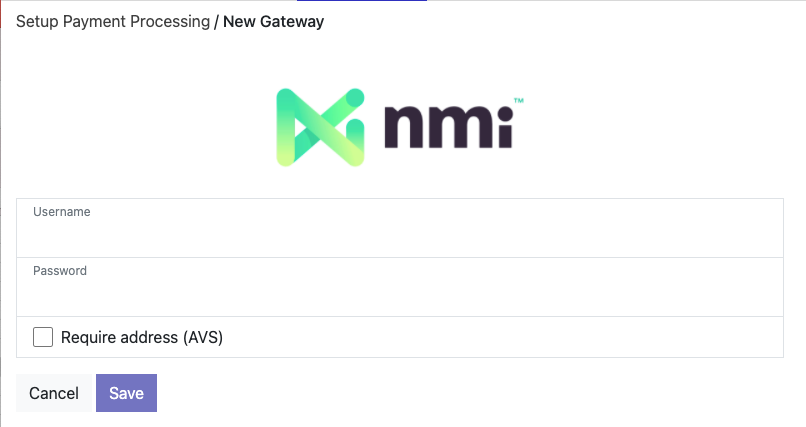
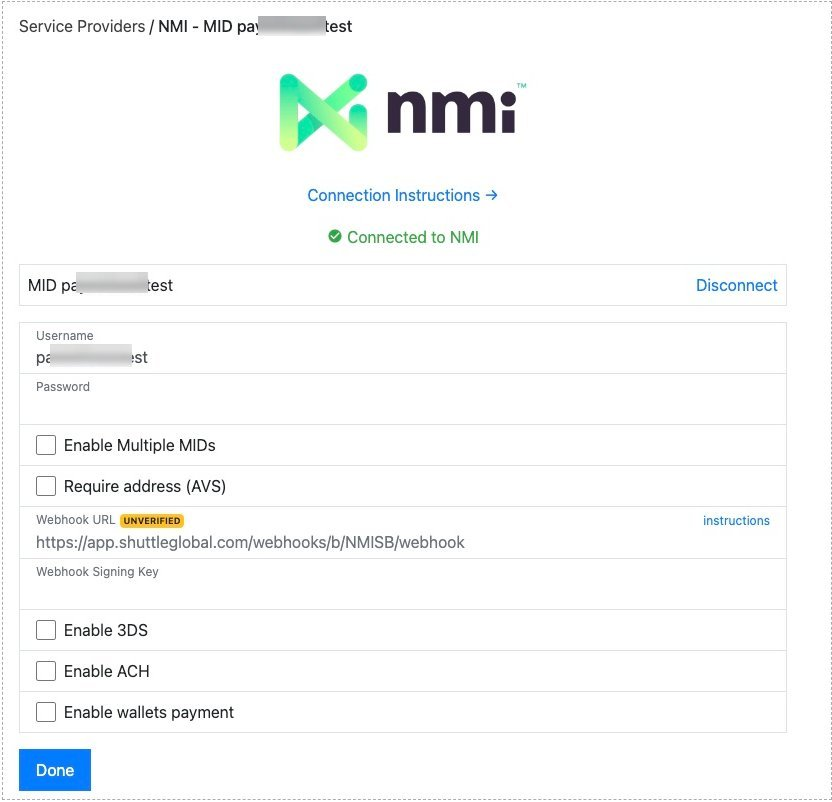
3. You will be prompted to setup webhooks (see “Enabling Webhooks” below)
4. Our integration with NMI offers several options:
- Enable 3DS: This enabled 3DS support for ecommerce transactions that require 3D secure. When selected it will show a field “Public Key”

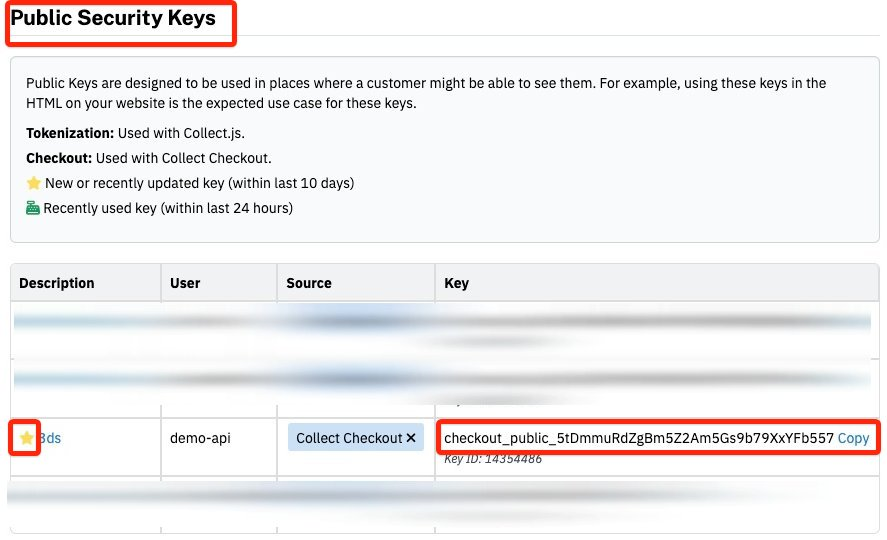
To get your public key, on NMI, go to “My Settings → Security Keys → Add New Public Key”:
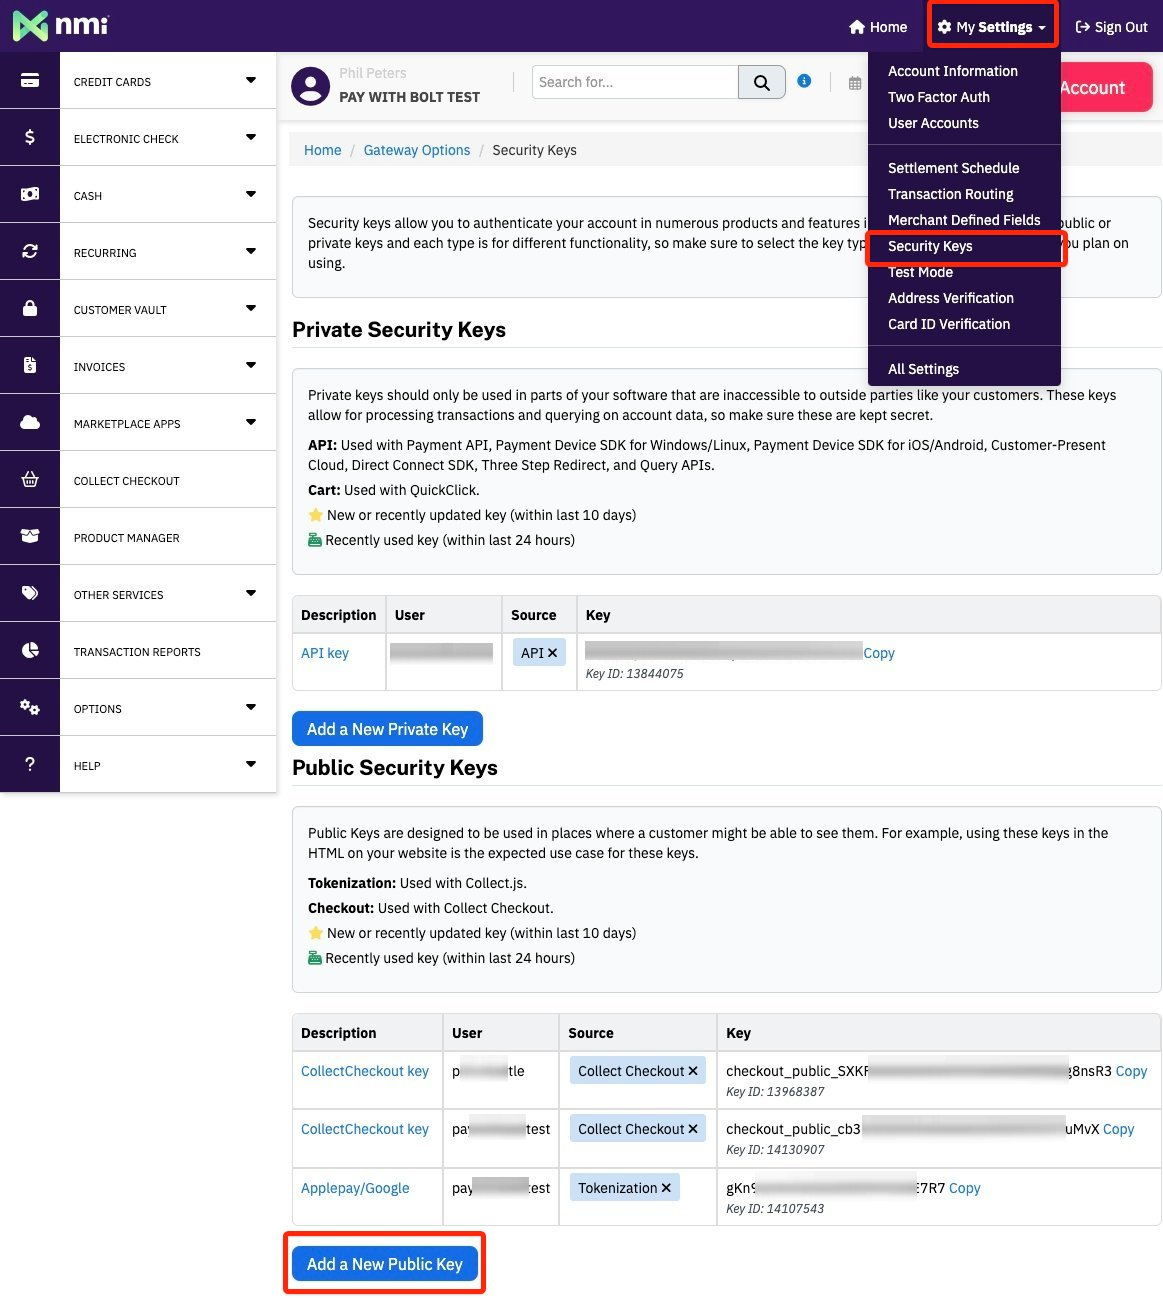
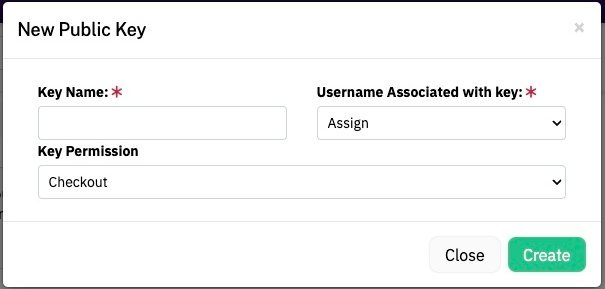
The create a key name, eg “3DS”, select your username from step 1, and Key Permission “checkout”
Then select the value for “Key” from “Public Security Keys”
- Enable ACH: This will enable ACH as a payment method, you must also enable this option on Stripe
- Require address (AVS): This will require customer enter their billing address
- Enable Multiple MIDs: This allows you to configure a different MID for ecommerce and MOTO (some acquirers will give you different accounts for this)

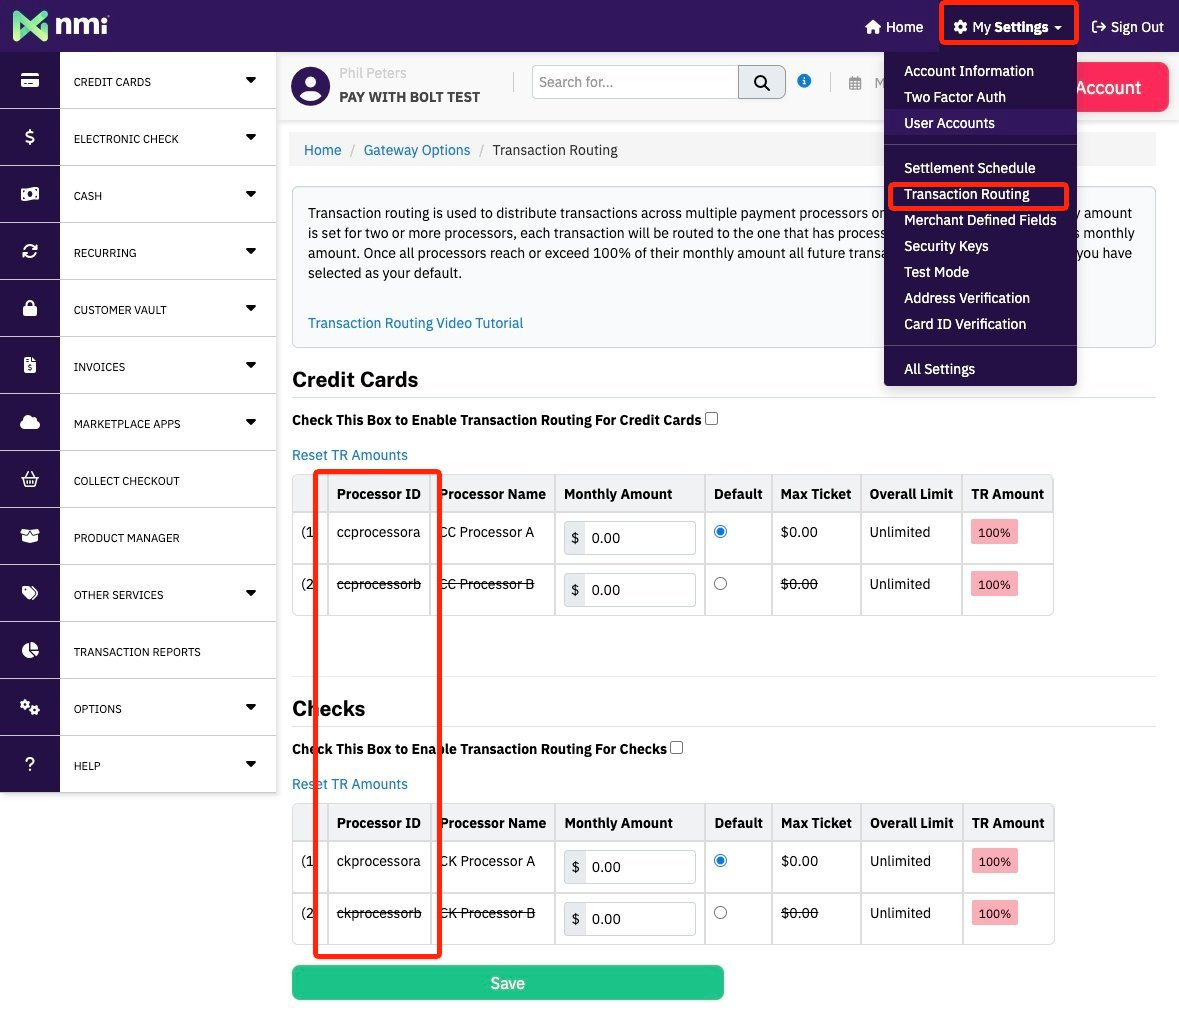
You can check your processor IDs on NMI, selecting “My Settings → Transaction Routing”
Enabling Webhooks
To ensure the correct operation of the NMI integration you need to setup "Webhooks" which is a way for NMI to notify us of updates.
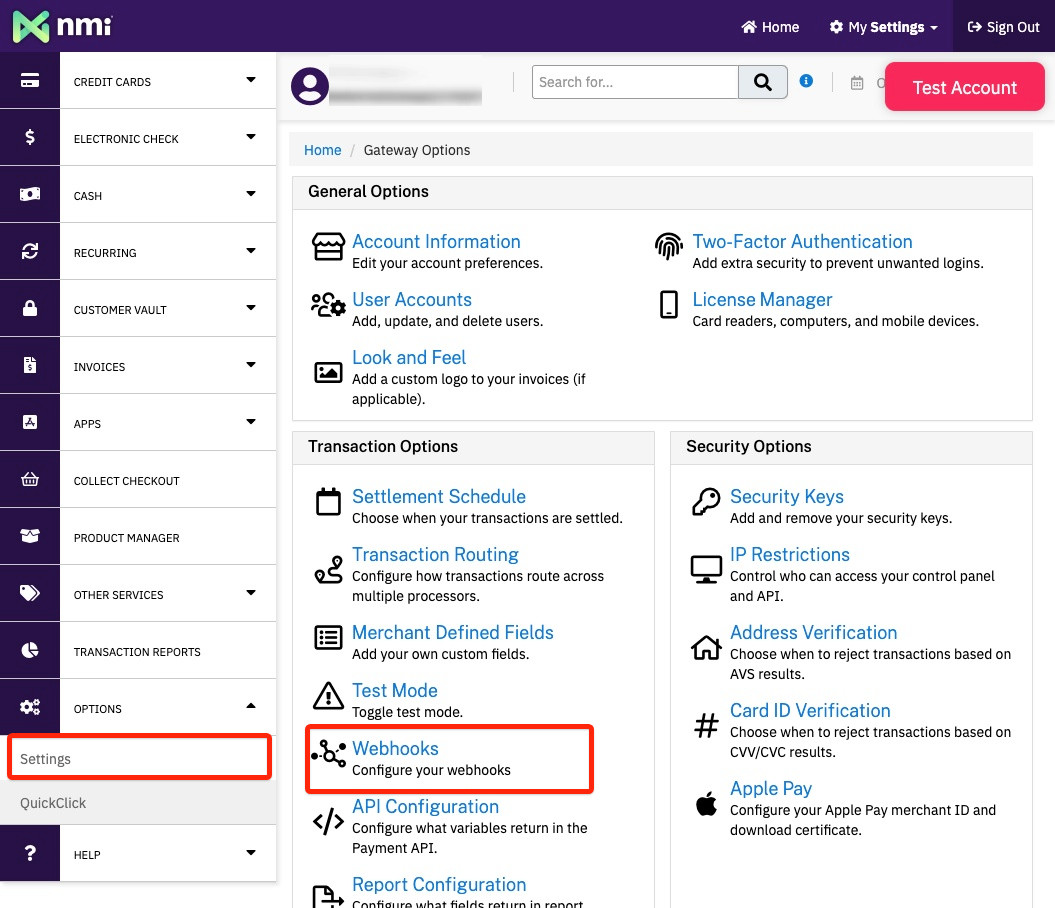
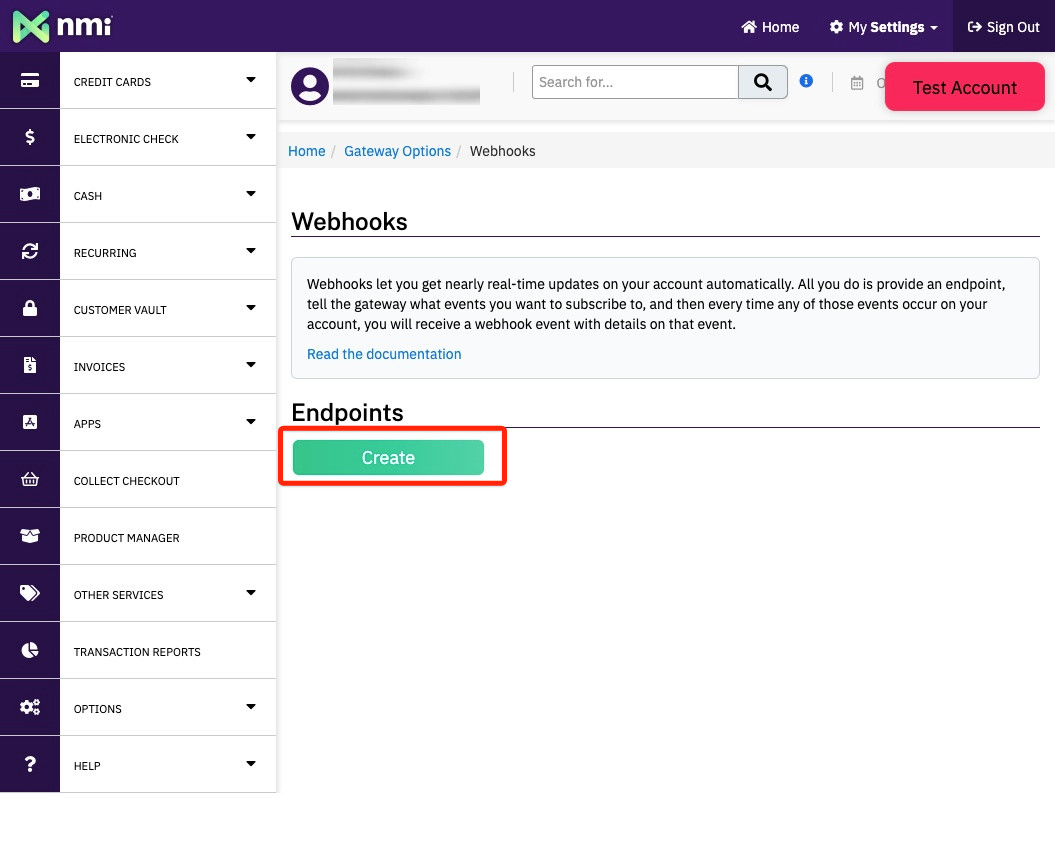
- On NMI navigate to Settings -> Webhooks.
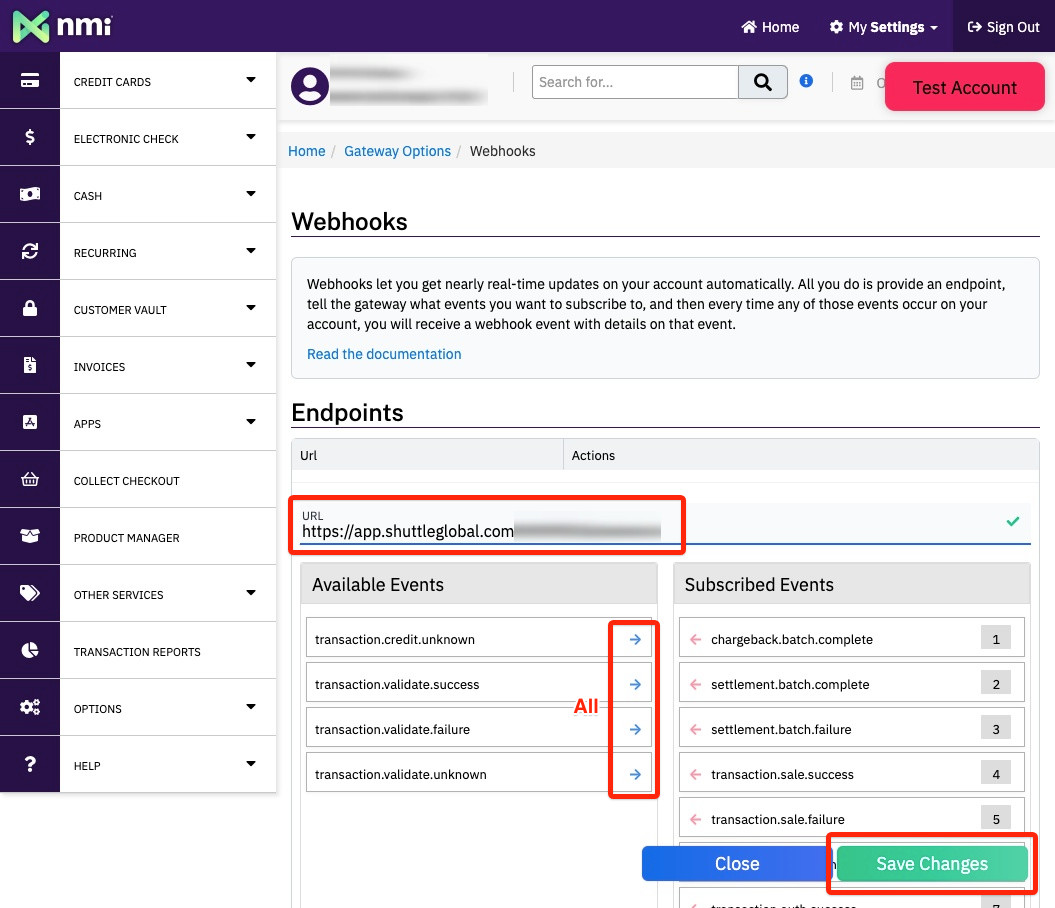
- Add a new Webhooks to the URL shown, and select "All" available Events.
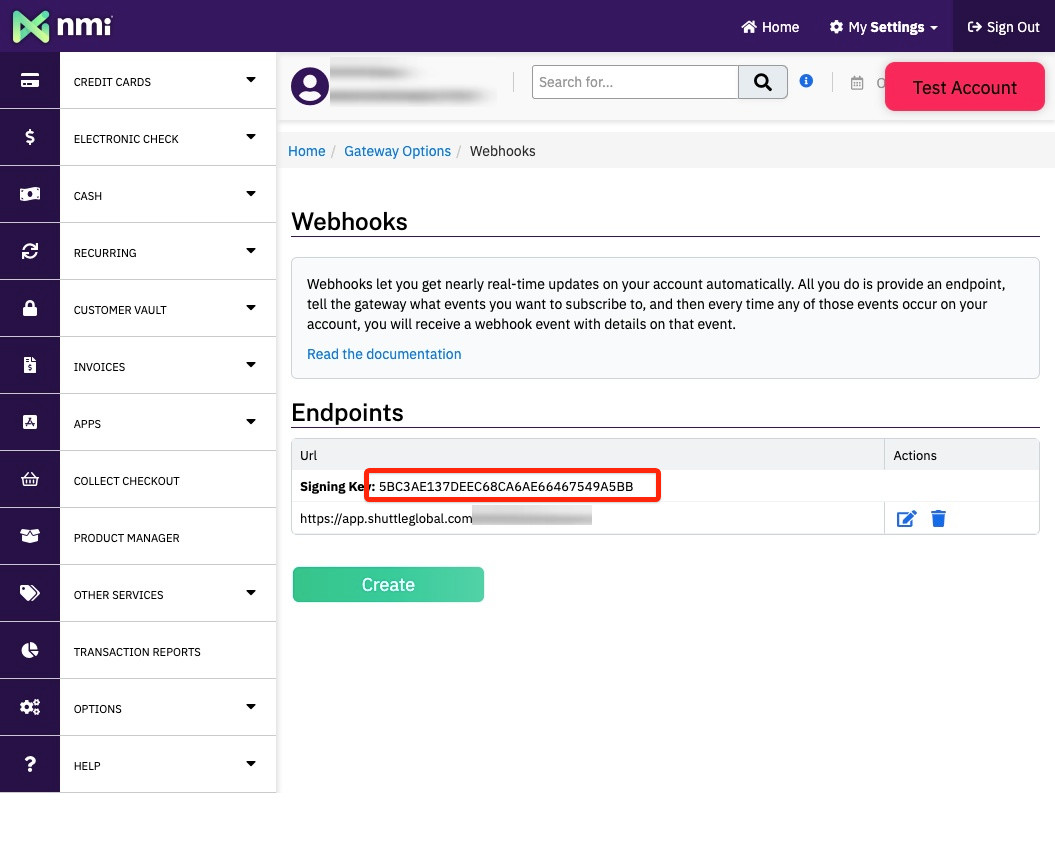
- You will be shown a "Signing Key", return to enter this value in the "Webhooks Signing Key" and save.
- We will test the Webhooks, this will take about 2 minutes, and will display either:
- UNVERIFIED : We've not received anything, double check your NMI setup.
- UNSIGNED : We've received a Webhooks but the signing key was missing or incorrect.
- VERIFIED : Its set up correctly!
