Connecting Braintree
Connecting Braintree uses API Keys, if you have not had the values supplied to you, you will need a Braintree login with “Account Admin” access.
Setup
- To setup Braintree you will need:
- Your Merchant ID
- Public Key
- Private Key
- If you don’t have these follow the below instructions
- Login to Braintree via: https://www.braintreegateway.com/login
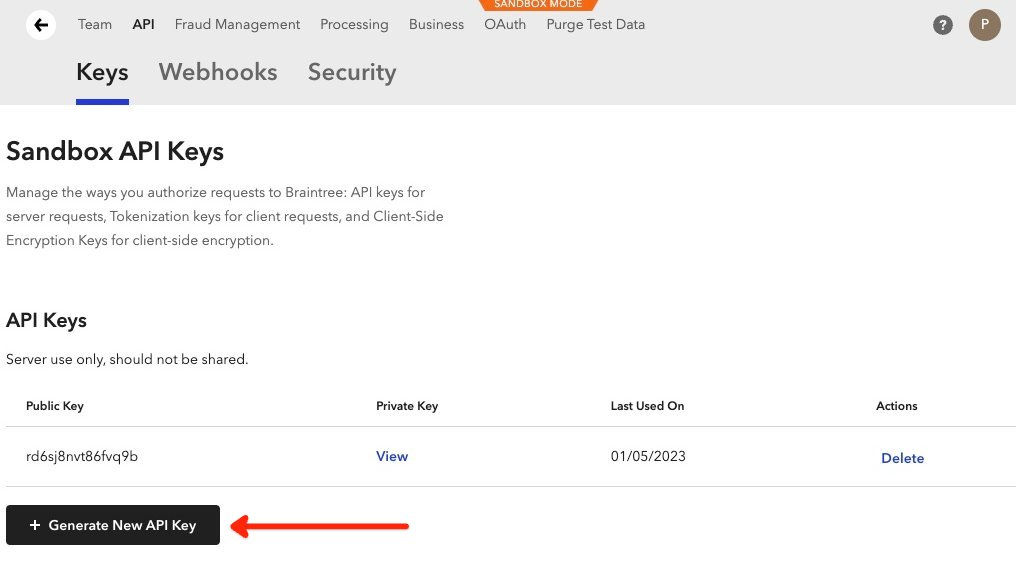
- Select Settings → API, Select “Generate API Key”.
Tip! Don’t share API Keys between multiple systems.

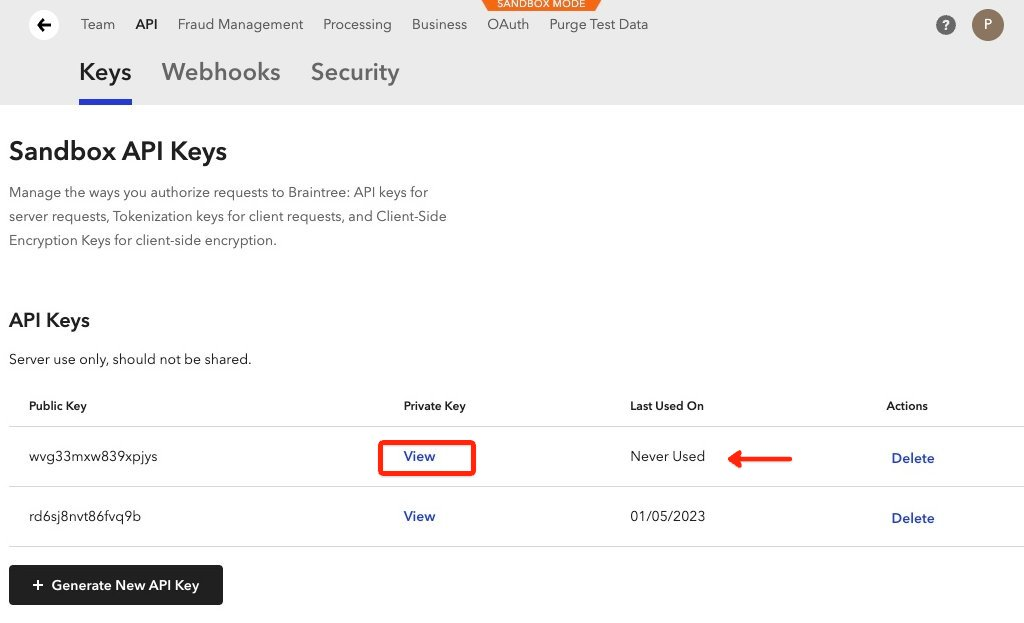
Find the key just generated and click “View”:
Here you will get the values for your:
- Merchant ID
- Public Key
- Private Key
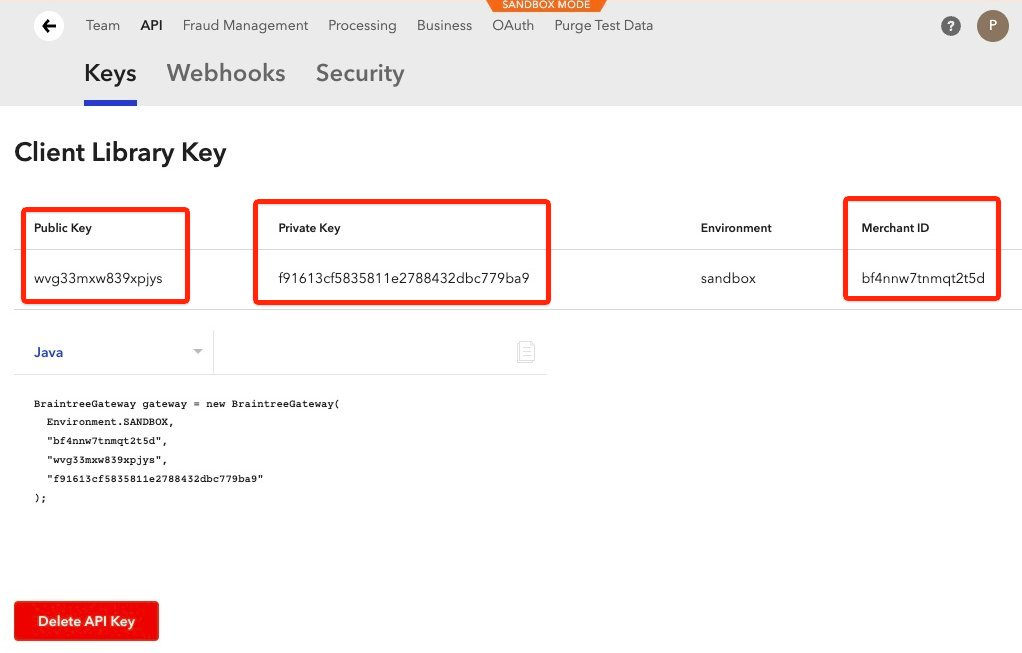
Tip! If the connection fails, make sure “Environment” says “live” unless you know you are in a sandbox environment.
3. The connection will be tested and you will be presented a green “Connected to Braintree” message, if there is an error with the connection
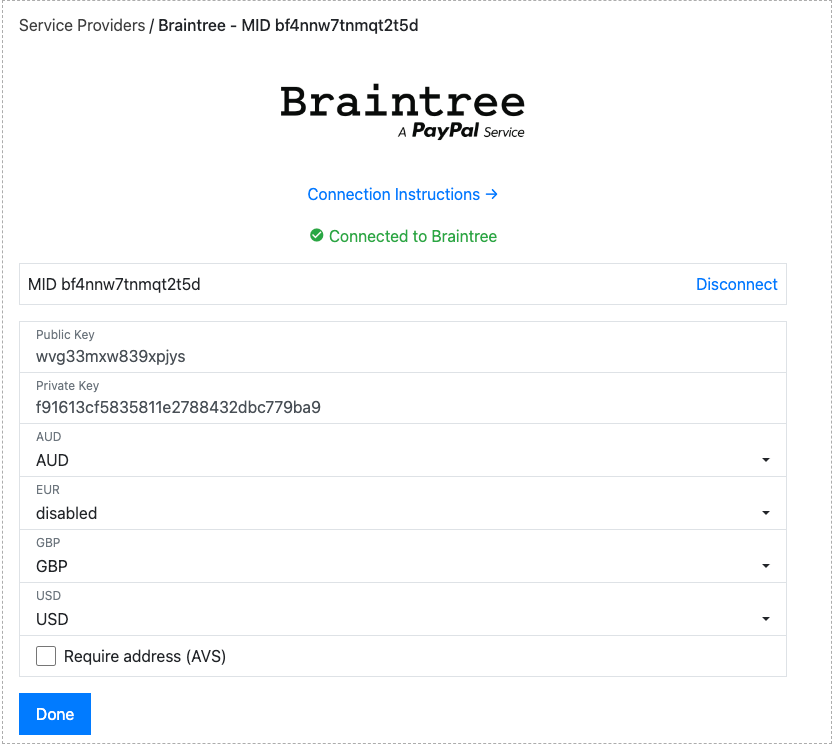
Our integration with Braintree offers several options:
- Public Key: If you update your credentials
- Private Key: If you update your credentials
- [Currencies]: Braintree only allows you to collect payment in the currency of one of your merchant accounts. We provide you a list of each currency you have configured and allow you to select which merchant account to settle into (see below)
- Require address (AVS): This will require customer enter their billing address
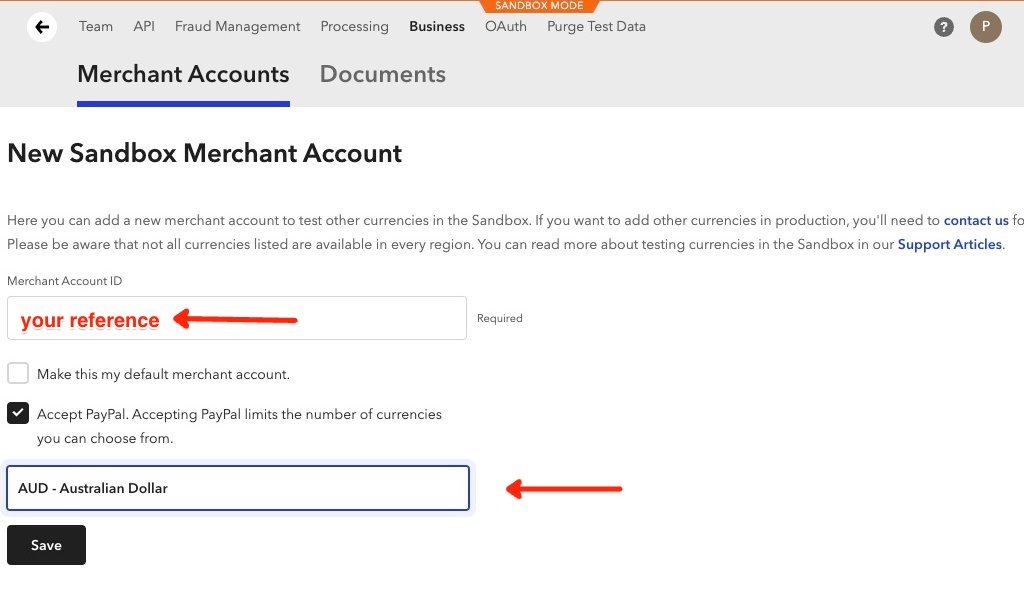
4. To add support for more currencies, go to Settings → Business

Here you can see the merchant accounts you have configured and add new ones. After adding a new one, return to the Braintree connection screen and the new merchant account will appear under its currency.
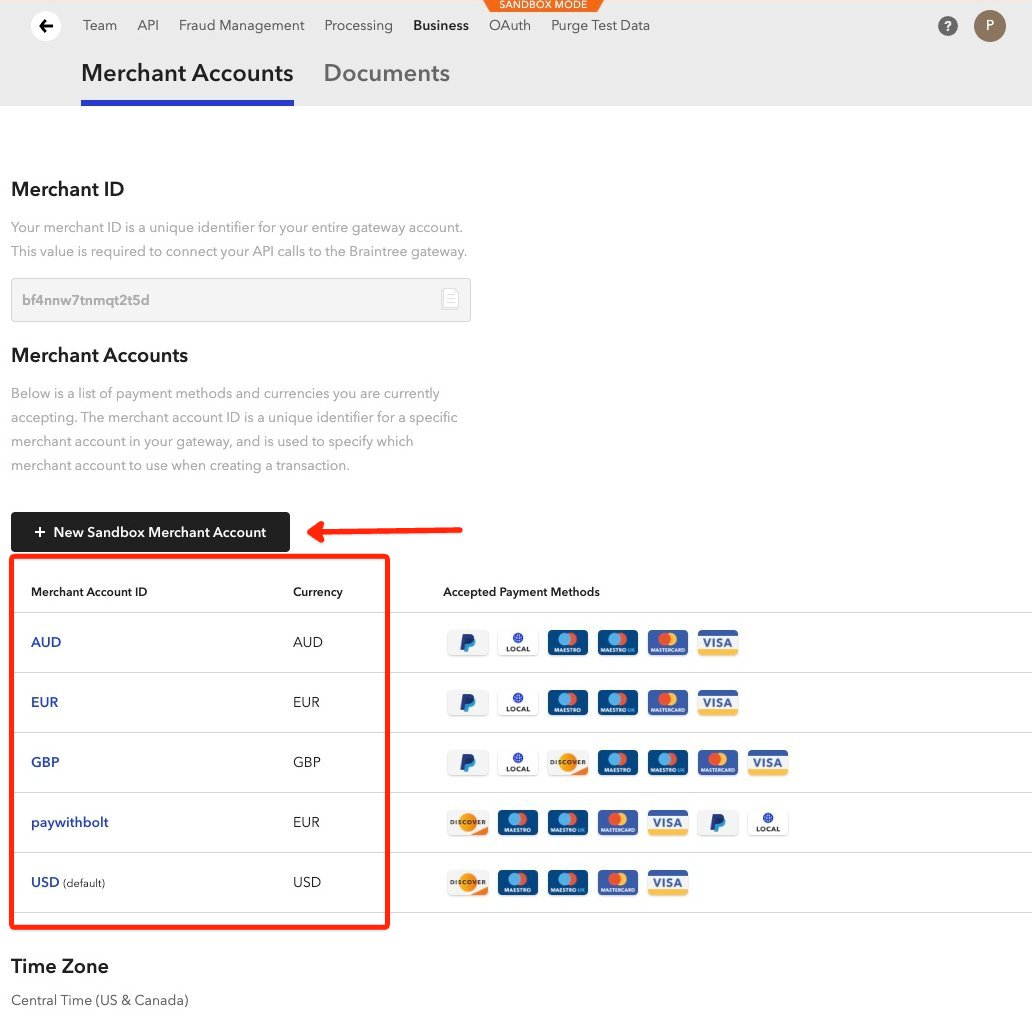
For example, to support AUD, add a merchant account in AUD (below is a test account screenshot, live will vary slightly).
